Friday, March 29, 2013

Easter Basket Cake Pops

Until very recently, I thought I didn't like cake pops. And let me tell you I was very wrong. These cake pops take a bit of time and effort but they are sooo worth it, and perfect for any Easter (or not-easter) celebration you might be having this weekend.

My baking experience has consisted of many cakes, and cupcakes and cookies cakes. All kinds of cakes. All of these cookbooks and recipes that I was seeing everywhere for cake pops though just weren't impressing me. Then one average Monday morning I can honestly tell you that a cake pop changed my life (yes, i had a cake pop for breakfast). These were pot of gold cake pops made by the wonderful Ann (or Pegasus or Pegs or Mama Desh) Deshler.


Mad props as I believed they were store bought, they're just so pretty. And seriously, I'm telling you that when I tried one I could not stop thinking about these cake pops. Hence, I had to try some of my own. And considering that St Patty's day had already passed, I decided I would make Easter Basket cake pops instead. 


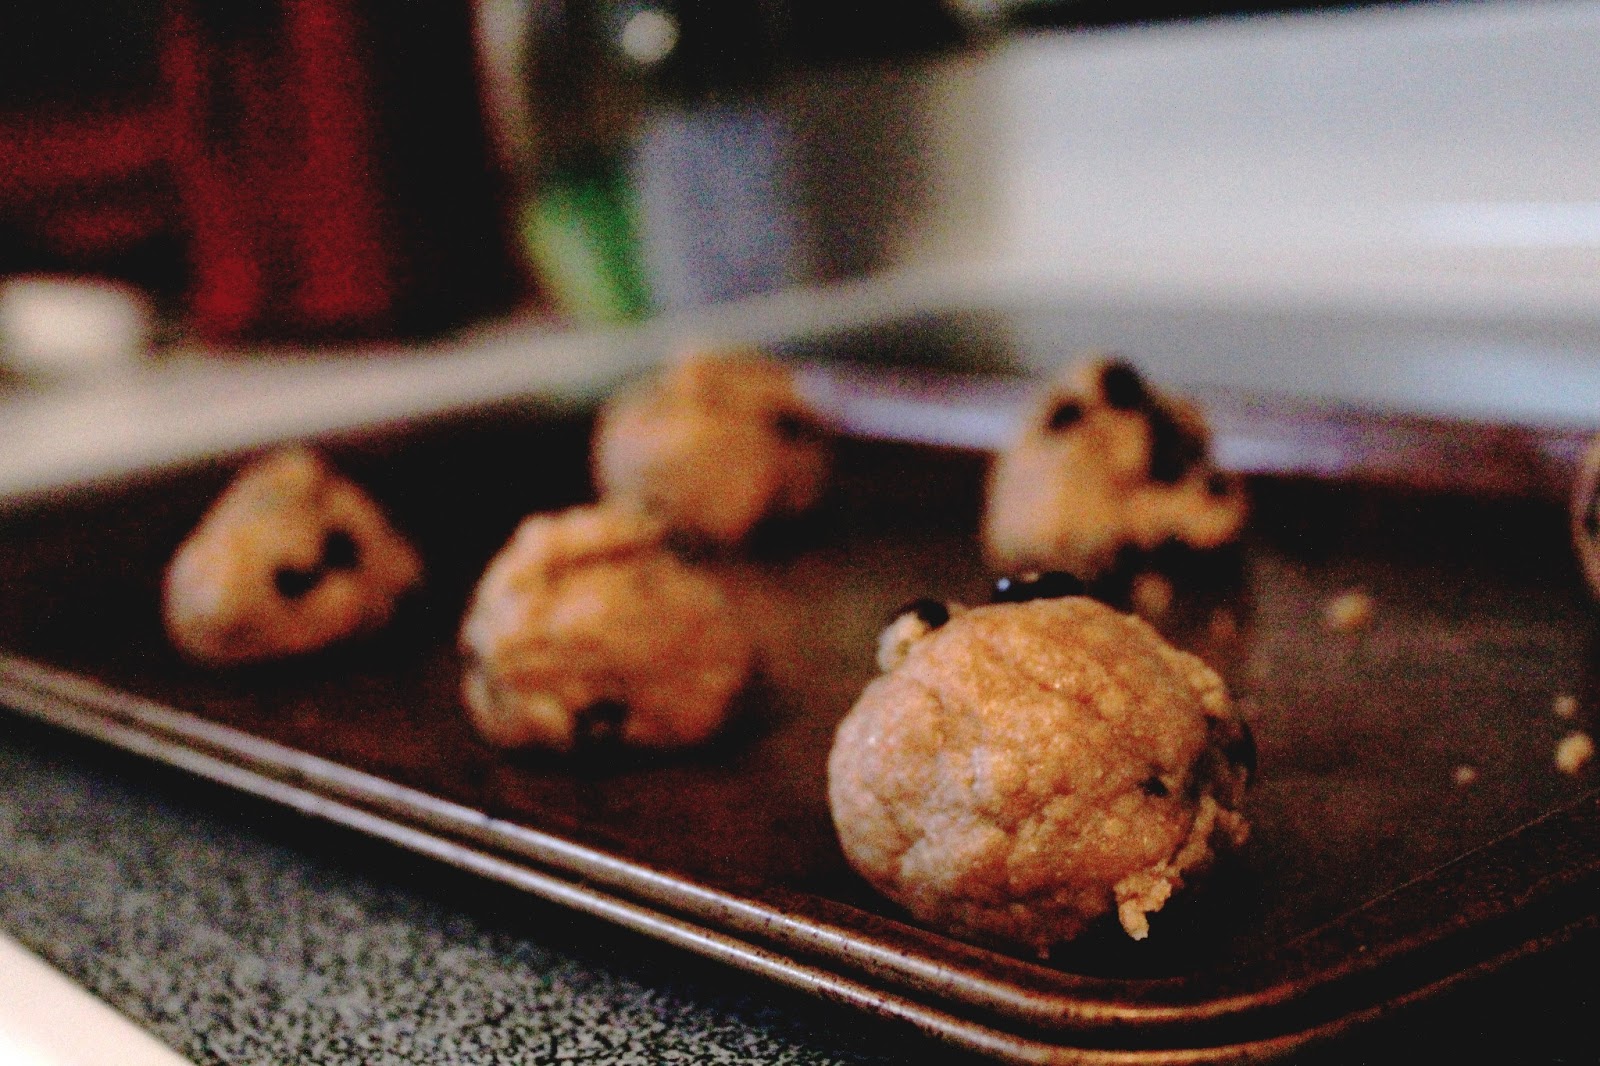
I did say the process was lengthy, only because it has so many steps, don't worry they're all simple on their own. Bake Cake, cool cake, crumble cake, mix cake with icing, ball cake, dip cake, enjoy.


These handles weren't totally necessary, but they were pretty easy if you feel like adding them (to properly complete your easter baskets that is). All I did was put my extra almond bark into a plastic bag, with one of the corners carefully cut off, and draw the handles with the tip you've just created. Once you've drawn the handles, freeze em for a bit and they'll harden. They'll still be fragile but they'll be ready to carefully attach to the top of your cake pops.


One trick I didn't initially think of. When you are going to put the sticks into the cake pops dip them in the almond bark, then the cake pop, then the almond bark again. It will help to make the sticks stay in the cake pops when everything is finished. 


The following is THE MOST important step. No matter what you do, do not skip the sprinkles on top of the cake pops.


Once you've dipped the cake pops once and the tops have hardened, you'll dip them one more time into a different colored chocolate to wet the tops again and then you'll dip them into your sprinkle bath. The crunch that this sprinkle coat makes at the top of the cake pop is truly what makes them phenomnomnomenal. I'm serious enough to say it again, DO NOT skip this step.

And here you have a finished product: 


These are phenomenal, please enjoy the recipe below. :)


I will soon have a recipe up for the cake that I used inside the cake pops because its truly delicious and listed below:

2 cups sugar
2 tablespoons maple syrup
2 cups soymilk
1/4 cup oil
1/4 cup applesauce
2 tsp. vanilla
3 cups flour
1/4 cup cocoa powder
2 heaping tablespoons instant coffee

1 teaspoon baking soda
1 teaspoon baking powder

Other ingredients you'll need: 

For the icing: 
2-3 cups powdered sugar
1 tsp. vanilla
1/4 cup maple syrup
1/4 cup soymilk

For the Coating: 
1 package white chocolate almond bark
1/2 cup colored chocolate candy melts
1/2 cup colored sugar sprinkles

Preheat oven to 350 degrees.

Mix sugar, syrup, soymilk, oil, applesauce, and vanilla in a large bowl. Sift flour, cocoa powder, and instant coffe into another bowl. Add baking powder, baking soda, and a pinch of salt to the dry mixture. Add the dry mixture slowly to the wet mixture. Make sure the mix isn't too lumpy (if you sifted the dry ingredients this shouldn't be a problem) and split the batter into two cake pans. 

(**Note that if you don't want to actually make the cake from scratch its totally acceptable to make a box of cake as directed on the box and continue with the steps that follow)

Bake for 30 minutes and allow the cake to cool. Once its cool enough, scrape the cake out of the pans into a large bowl and let cool in the refrigerator for another 30 minutes. While you wait for the cake to cool you can make the icing: 

Mix 1/4 cup maple syrup, 1/4 cup soymilk and 2-3 cups powdered sugar. Add the powdered sugar slowly, this icing should be runnier than most. 

Once the cake has cooled in the fridge and you have prepped your icing, mix the two together. You may want to use your hand to mix the cake thoroughly. It's important to get everything smooth and I ended up using a potato masher to help with this step. 

Lay two pieces of wax paper on your working surface. Roll the cake into balls similar to cookie dough and place on the waxed paper. Melt almond bark in the microwave. Dip stick into almond bark, dip stick into cake bal and dip the whole thing into the almond bark again, coating the entire cake pop. 

Once you have dipped all of the cake pops once let them cool and harden while you melt the colored chocolate. Put enough of your colored sprinkles at the bottom of a bowl. Once they are cooled, dip into the colored chocolate, and immediately dip into the colored sprinkles. Place on wax paper to cool again. 

If you choose to add the handles, find a way to prop up your cake pops and remove your handles from the freezer (you can find how to actually make the handles above). I propped my cooling rack up with a few cups and placed the cake pops in the holes on the rack. Use two drops melted almond bark as glue to attach the handles and allow to cool again. 

And now the hardest part of the entire process, you have to WAIT to eat the beautiful cake pops you've just made. The cake pops must be stored in the refrigerator, and they must be chilled to be thoroughly enjoyed. Trust me when I say its difficult but its worth it. 

I have not tried freezing them, though I am sure that would be a good option as well. 


So make your family happy with some pretty cake pops this year, I promise they will not be a disappointment. :)

Thursday, March 14, 2013

Chai Spiced Snickerdoodles

As promised, Chai Spiced Snickerdoodles. Snickerdoodles are hands down my favorite kind of cookie and this recipe just throw things into a whole different world.  Ginger, cardamom, all spice, cloves and cinnamon are all part of the final steps in these cookies and I tell you, they are fabulous.


As with traditional snickerdoodles, the final step is to roll all of the cookies in the sugar and spice mixture that you have created. I once again used my raw sugar for this recipe, and coating the cookie dough in the raw sugar (as well as all of the delicious spice) before baking added the perfect final touch.


pheNOMNOMNOMenal. Seriously.

Careful when baking, snickerdoodles are very easily overcooked, and they're best when they're chewy so watch your cookies carefully. 


And for a recipe:


For the cookies:
1/2 cup canola oil
1 cup sugar
1/4 cup pure maple syrup
3 tablespoons milk (or soymilk to keep things vegan)
1/2 teaspoon ground cinnamon
2 teaspoons pure vanilla extract
2 cups flour
1 teaspoon baking soda
1/4 teaspoon salt

Sugar & Spice Mixture: 
3 tablespoons sugar (raw sugar is superb)
1/2 teaspoon cinnamon
about 1/4 teaspoon each of: 
Cardamom
Ginger
Cloves
All Spice

Preheat oven to 350 degrees. 

Mix oil, oil, sugar, maple syrup, and milk. Once mixed add vanilla and cinnamon. Mix flour baking soda and salt in a separate bowl. Once combined, add the flour mixture to the wet mixture 1/2 cup at a time until your dough comes together nicely. 

Combine all ingredients of the sugar and spice mixture in a small bowl. 

Roll your dough into tablespoon sized cookie dough balls and then roll them in your sugar and spice mixture. Place on baking sheet with adequate room to spread out and bake for 10-12 minutes. Remember to watch carefully, everyone loves a chewy snickerdoodle.

Nomnomnom until next time. 


 cookie recipe credit to: http://www.theppk.com/2012/09/chaispicesnickerdoodles/


Wednesday, March 13, 2013

Hot Cho Cookies

I don't know about you but I am not a fan of the way that Winter is playing peek a boo this year.  Severe snow storms one day and signs of early spring the next, no one likes a tease mother nature. So if you're struggling with this whole Winter thing as much as me, hopefully you'll find comfort in these easy & delicious hot chocolate cookies.

Yes that is correct, actual hot chocolate in these cookies.  I literally can not describe how wonderful these chewy cookies truly are. The best chocolate cookie I've had by far, and topped with marshmallows? Crazy delicious.


I recently bought a bulk bag of Raw Sugar from Costco and I've been extremely excited to use it. The recipe I originally found called for brown sugar, but I did some work to make my own with the raw sugar. 


Don't fret when I say made my own. By that I simply mean that I combined a bit of raw sugar with a bit of maple syrup before I mixed it with the butter. If you don't have raw sugar, and you'd prefer to use brown sugar, no problem. Same goes for if you choose to combine granulated with maple syrup as well. 


The cookies don't take long to bake, and they come out much flatter than when they go in, so be sure to spread them out and give them plenty of room to expand. 


And of course, what is a cup of hot cocoa without a few marshmallows on top? After they've baked and you've let them cool a bit, you'll top them with mini marshmallows. And if your previous cooking experience is anything like mine you'll use the broiler on the oven for once in your life to toast the marshmallows. Watch them carefully as they toast though, they are very easily burnt.


Fun fact: if you bake (rather than broil) any baked goods with marshmallows they'll expand while they are in the oven and they'll disappear when they cool after they come out. Hence, broiling to enjoy these toasted marshmallows on top.


And there you have them. The wonderful hot chocolate cookie. So stay warm and toasty, they're predicting 50's this weekend but I'm just not convinced that it will last just yet. 


And here's the recipe to save for your next snow day: 


1 cup raw sugar & 2 tablespoons maple syrup (OR 1 cup granulated & 2 tbsp syrup OR 1 cup packed brown sugar)
1/2 cup or 1 stick butter, softened
2 eggs
1/2 cup cocoa powder
2 packets hot cocoa powder
1 teaspoon vanilla
1 cup flour
1 teaspoon baking soda
1/4 teaspoon salt
1 cup mini marshmallows

Preheat oven to 350 degrees.

Mix together sugar (and maple syrup if applicable), and butter until creamy. Add the eggs and the vanilla. Combine the cocoa powder and cocoa mix and add to the wet ingredients. Mix together remaining dry ingredients, and add to the rest of the dough. 

Place tablespoon sized cookies on a parchment lined baking sheet (with plenty of room for expansion) and cook for 10-12 minutes. 

Switch oven to broiler.

Once the cookies have cooled a bit, top with mini marshmallows and place as close to the broiler as possible, watching carefully as the marshmallows puff and turn golden brown. (This happens quickly so keep a close eye)

Voila, hot chocolate cookies to enjoy with your hot chocolate on that snow day we're all hoping won't happen again, but lets be real it probably will. (I should also mention that if hot chocolate isn't your thing, stay tuned for chai spice snickerdoodles coming soon. :) )

Nomnomnom until next time. 


recipe adapted from: http://eclecticrecipes.com/hot-chocolate-cookies

Monday, February 25, 2013

Beer and Bacon Cupcakes

Beer and Bacon Cupcakes. Yep, you read right. Beer and bacon cupcakes. I know it sounds strange, but it's a chocolate cupcake topped with maple glazed BACON so don't knock it until you've tried it. I came across this recipe while trying to bake a birthday treat for a male friends 21st birthday, and quickly discovered that these would be perfect. Though my vegetarian choices bar me from eating such cupcakes, I do love the smell of bacon so I'm pleased to say that at least that much was enjoyable.

So yes dreams do come true, Beer and bacon cupcakes. Some people love cupcakes. And it's pretty hard to find someone that doesn't like bacon, so this dessert is a win-win. Complete with a Guinness chocolate cupcake, maple cream cheese frosting and maple glazed bacon these might just provide a definition for the American Dream. Savory as well as sweet these cupcakes can please even the manliest of men. Recipe below, please enjoy. 


And there's that bacon I mentioned earlier. Personally maple glazed and baked, be sure to watch it carefully as you'll have to redrizzle the maple syrup quite frequently and it easily burns if left unattended. I will warn you that your whole house is about to smell amazing. 


And no worries about above mentioned alcohol content, the first step for the cupcakes is to heat the butter, Guinness and chocolate chips, causing all alcohol to cook off. (And if it was the actual cooking off that you were worried about, my apologies. No tipsy cupcakes for you). In addition to that, if you choose not to use Guiness at all, I'm sure these cupcakes would be fine with some sort of dark cola like Coke as well. 


And here I give wonderful stirring credit to my roommate Miss Maddie T. Fair warning, this batter does seem like its a little dry, and almost a little spongy but just be sure that they bake long enough and it shouldn't be a problem.

And here they are, the pheNOMNOMNOMenal guinness cupcakes.


And finally: the finished product. Nobody can really argue with a cupcake that looks this good. 


Seriously, these are pretty beautiful. So I figured lots of pictures were appropriate. Now that your mouth is probably watering, I should probably let you know how to make them. 


Ingredients:

Cupcakes

1 cup Guinness (or 1 cup Coca Cola)
1 stick butter
1/2 cup cocoa powder
1 cup chocolate chips
2 cups flour
1-1/2 cups sugar
1 1/2 teaspoons baking soda
1 teaspoon salt
2 eggs
2/3 cup plain Greek yogurt
1 tsp vanilla extract

Maple-Glazed Bacon

3 strips bacon
1/3 cup maple syrup

Frosting

8oz block cream cheese, softened
1 stick butter, softened
1 cup powdered sugar
1 tbsp maple syrup
1 tbsp candied bacon drippings

Directions:

For the cupcakes:

Preheat oven to 350. 

Melt the butter and Guinness on the stove until they become one liquid mixture. (Note that if you choose to use Coke you should add it after you have added the mixture to the eggs and yogurt as I'm not sure how it would fare on the stovetop). Add the cocoa powder and the chocolate chips, and continue to stir until everything has melted together. Set aside to cool. 

In a new bowl mix the eggs and greek yogurt together. Add the chocolate-guinness mixture to the eggs and yogurt. (This is when you would add the Coke if you are using it in place of the Guinness). Make sure to do this slowly, as any heat in the chocolate will cook the eggs if added all at once. Add the dry ingredients to the bowl and stir wet and dry ingredients together. 

Bake for about 15 minutes and allow your cupcakes to cool while you cook the bacon. 

For the bacon:

WARNING, your house is about to smell delicious. 

Turn oven up to 375.

Line a baking sheet with aluminum foil and lay your bacon strips on the foil. Using a pastry brush (or if you dont have one you can use the back of a spoon) cover each piece of bacon with a layer of maple syrup. It's good to use a Rimmed baking sheet for this step, as you'll be saving the bacon grease for use in your frosting (yes you read that right, bacon grease IN the frosting).

Bake for 5 minutes, re-apply some maple syrup and bake 5 minutes more. Flip the strips over, re-apply maple syrup once again and bake for another 10 minutes. One more time, brush you bacon with maple syrup and bake for another 10 minutes

In a large bowl, beat together butter and cream cheese until smooth. Add the maple syrup, followed by the bacon grease. Add the powdered sugar a little at a time until you have a thick and creamy consistency. 

Finally, crush and crumble your bacon and sprinkle over the top of your freshly frosted cupcakes. 


I have no doubt you'll enjoy these. Only because this is America, and these cupcakes have bacon. 


Nomnomnom until next time. 

Recipe credit to: http://www.justputzing.com/2012/06/chocolate-beer-batter-cupcakes-with-maple-bacon-frosting.html


PMS Cookies

When I originally found this recipe, they were titled PMS cookies. And while I have to say they would definitely do the trick for PMS, I dont think they should be "that time of the month" cookies, I think they should be "ANY time of the month cookies" because I could eat them all day every day.  And these cookies definitely aren't gender biased because I promise that EVERYONE, male or female, will love them.

And believe it or not I haven't even gotten to the best part yet. In total, this recipe only cost me around 5 dollahs. Talk about wonderful. Super simple, super inexpensive, and super delicious. Doesn't get much better than that.


The only special instructions for assembly is that preparing all of the cookies, one half at a time is the easiest way to get these cookies to come together nicely. You may be thinking this is a very obvious statement, but I promise had I not advised you otherwise you would have spent quite a bit of time struggling to spread mallow fluff on top of peanut butter. From personal experience, that does NOT work. At all. So save yourself some time and prepare all at once before smashing together.


Speaking of ease, the chocolate dipping is probably the least easy part. It gets messy, but the best way I've found is to dunk the cookies rotate them with your (squeaky clean of course) hands before pulling them out and quickly transferring to a sheet of parchment paper. Warning though, the chocolate can be very hot. Feel free to allow it to cool a bit after it melts (this would be advised actually), you'll still have plenty of time to dunk the mallow-pb-cracker-combos before the chocolate hardens again.


And voila! I'm regretting that I didn't get a prettier picture of these, but honestly this is one cookie where aesthetics don't matter, because they taste phenomenal either way. Allow the cookies to cool and harden, then feel free to indulge. It's also good to know that they taste even better when you freeze them. So stock up, they could last you quite a while (or they won't if you live in a house with 5 other women). In any case, enjoy the recipe below.


Ingredients:
about 2 sleeves ritz crackers (or great value "buttery rounds")
1/2 cup Marshmallow Fluff
1 cup peanut butter
1 package almond bark

Instructions: 
Spread Marshmallow Fluff and peanut butter between two crackers and dip in melted almond bark. Lay finished cookies on parchment paper to cool. Store at room temperature (acceptable), in the fridge (a little better) or in the freezer (phenomenal-- and highly recommended).


Nomnomnom til next time. 


Saturday, February 2, 2013

Chocolate Chip Cookies

Classically wombo-ed, I'm hoping everything I make with this newly created blog will be not only pheNOMenal, but also delicious. I should note that I'm definitely the kind of blog reader that just scrolls to the bottom as quickly as possible to find the recipe. If thats the case with you as well, no offense taken if you choose to scroll all the way to the bottom. Though there are few helpful tidbits inbetween :)


When my baking addiction began, I found myself straying from the typical, making things like "double chocolate peanut butter fudge nutella cinnamon bites." Maybe that was an exaggeration, but really I just avoided average cookies, recipes that I felt were exhausted. As I began to bake more though, I found myself wanting to make the BEST chocolate chip cookie that I could, rather than the most cracked out chocolate chip cookie anyone had ever made. And who doesn't like chocolate chip cookies? So I figured I would start with a chocolate chip cookie that is definitely a contender for the best.

I should start by saying that the best chocolate chip cookie is extremely subjective. My top 2 requirements: soft and chewy. And I suppose they should be delicious. This cookie happens to be all of those things. And they also happen to be vegan.


There were a couple odd things about this recipe, the first being that there was both whole wheat and all purpose flour. If all that you have is all purpose, don't fret too much and feel free to use two cups of all purpose instead of two of each. Though I do believe the whole wheat four added to the wonderful chewiness. 


 The second oddity for this recipe, no granulated sugar, only brown. And only 1/2 cup. Odd, but low on sugar is always fine by me.


And of course, because it's vegan lots and lots of things to help the dough form and rise. A teaspoon of each baking powder and soda. Best not to forget things like this. 


As far as skimping on ingredients go, the recipe I found called for only 1/2 cup of chocolate chips. If you're anything like me in the amount of chocolate you like in your cookie, you'll definitely need to make that a heaping half of a cup, and in addition to that perhaps add a couple more handfuls. Amount of chocolate chips is something up to you. Though I personally prefer many many many of them. 


Fair warning, when the recipe has you mix all of the wet ingredients together, your soymilk is not going to mix well with your oil at first. And it will look a little nasty. Not to worry though, give it a quick stir when all of your ingredients are in the bowl and you should have no problem getting them to appear as pictured below:


Another warning, this dough may look a little bit drier than the usual cookie dough. If you need to you can add a little bit of extra soymilk though its okay to leave the dough a bit dry, and mixing it with your hands is also encouraged. 


Make sure to form all of the balls well with your hands, about the size of a golf ball is best, also good to press the dough down a little bit as these cookies won't expand too much unless they're encouraged a bit.


Bake and voila! Cookies, cookies, cookies!

The cookies only bake for about 10 minutes, but watch them carefully, when cooked perfectly the dough is extremely chewy, but burning them at all can make them very dry.


I should also add that I was going to make these cookies to share at the super bowl party that was taking place at my house but making cookies for a party 3 days early is never a good idea. I tripled the recipe, making around 2 1/2 dozen cookies, but lets just say they didn't last very long. But hey the good news is, I get to bake more, and therefore blog and share more. And finally,  a recipe. Enjoy :)

Recipe

1 cup whole wheat flour
1 cup all purpose flour
1/2 cup brown sugar
1 tsp. baking soda
1 tsp. baking powder
1/2 tsp. salt
1/2 cup chocolate chips

1/3 cup canola oil
1/4 cup non-dairy milk (I used vanilla soy)
2 tsp. vanilla
2 tbsp molasses

Directions:

Preheat oven to 350.

Mix the flours, sugar, baking soda, baking powder, salt and chocolate chips in a large bowl. Mix oil, soymilk, vanilla and molasses in a separate bowl. Once combined, stir into dry ingredients. Once everything is mostly combined you may have to complete mixing with your hands.

Place golf ball sized cookie dough onto greased baking sheet, with about 2-3 inches between. Press the dough flat a before baking for about 10 minutes. Watch the cookies carefully as over baking can easily make them very dry.


And all thats left to do is enjoy.

Nomnomnom til next time.


recipe credited to: http://www.yourdailyvegan.com/2012/11/13/simple-quick-chocolate-chip-cookies/